Upload documents
Choose the right destination, add your files, and track them through processing and review.
Upload from the location where the document should live. Your destination controls who can access the file; a filename or tag is not an access-control mechanism.
Choose a destination
- Public Files: content intended for authenticated users across the organization, subject to approval.
- Group: material for that group's members and owners.
- Data room: material managed within that room and its sharing rules.
Open the intended location first. Group and room upload dialogs keep their destination fixed. Do not upload confidential team material to Public Files as a temporary step.
Add and check your files
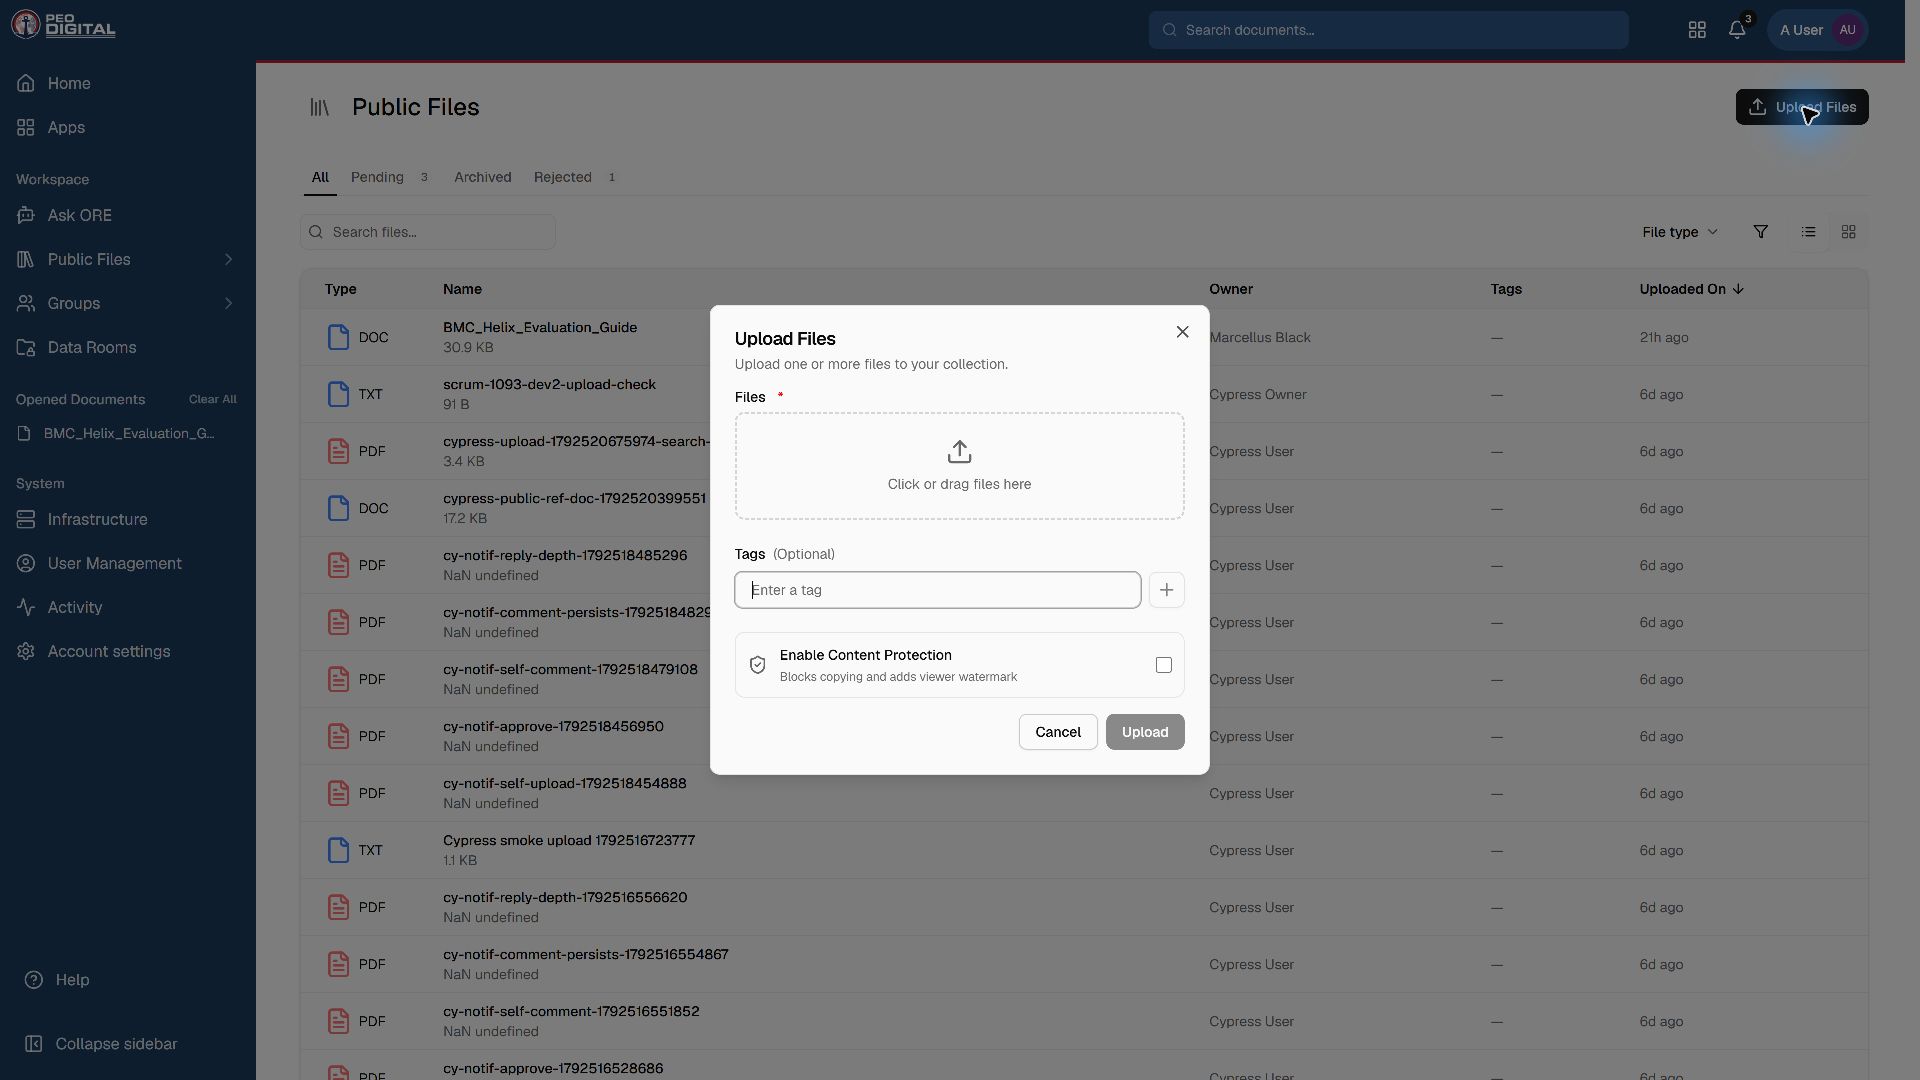
- Select Upload Files in Public Files, or Add File in your group or room.
- Use the file picker or drag files into the dialog.
- Review each display name. Resolve duplicate staged names before continuing.
- Add optional tags that describe the subject. Tags help organization; they do not change access.
- Review Enable Content Protection if shown. It adds viewer restrictions and a watermark; it does not replace destination permissions or your organization's information-handling rules.
- Select Upload and follow the upload-progress notification.
Processing and approval
Every uploaded file passes malware scanning. Accepted files can continue through text extraction, preview generation, and indexing. Completion of transfer does not mean all of those stages have finished.
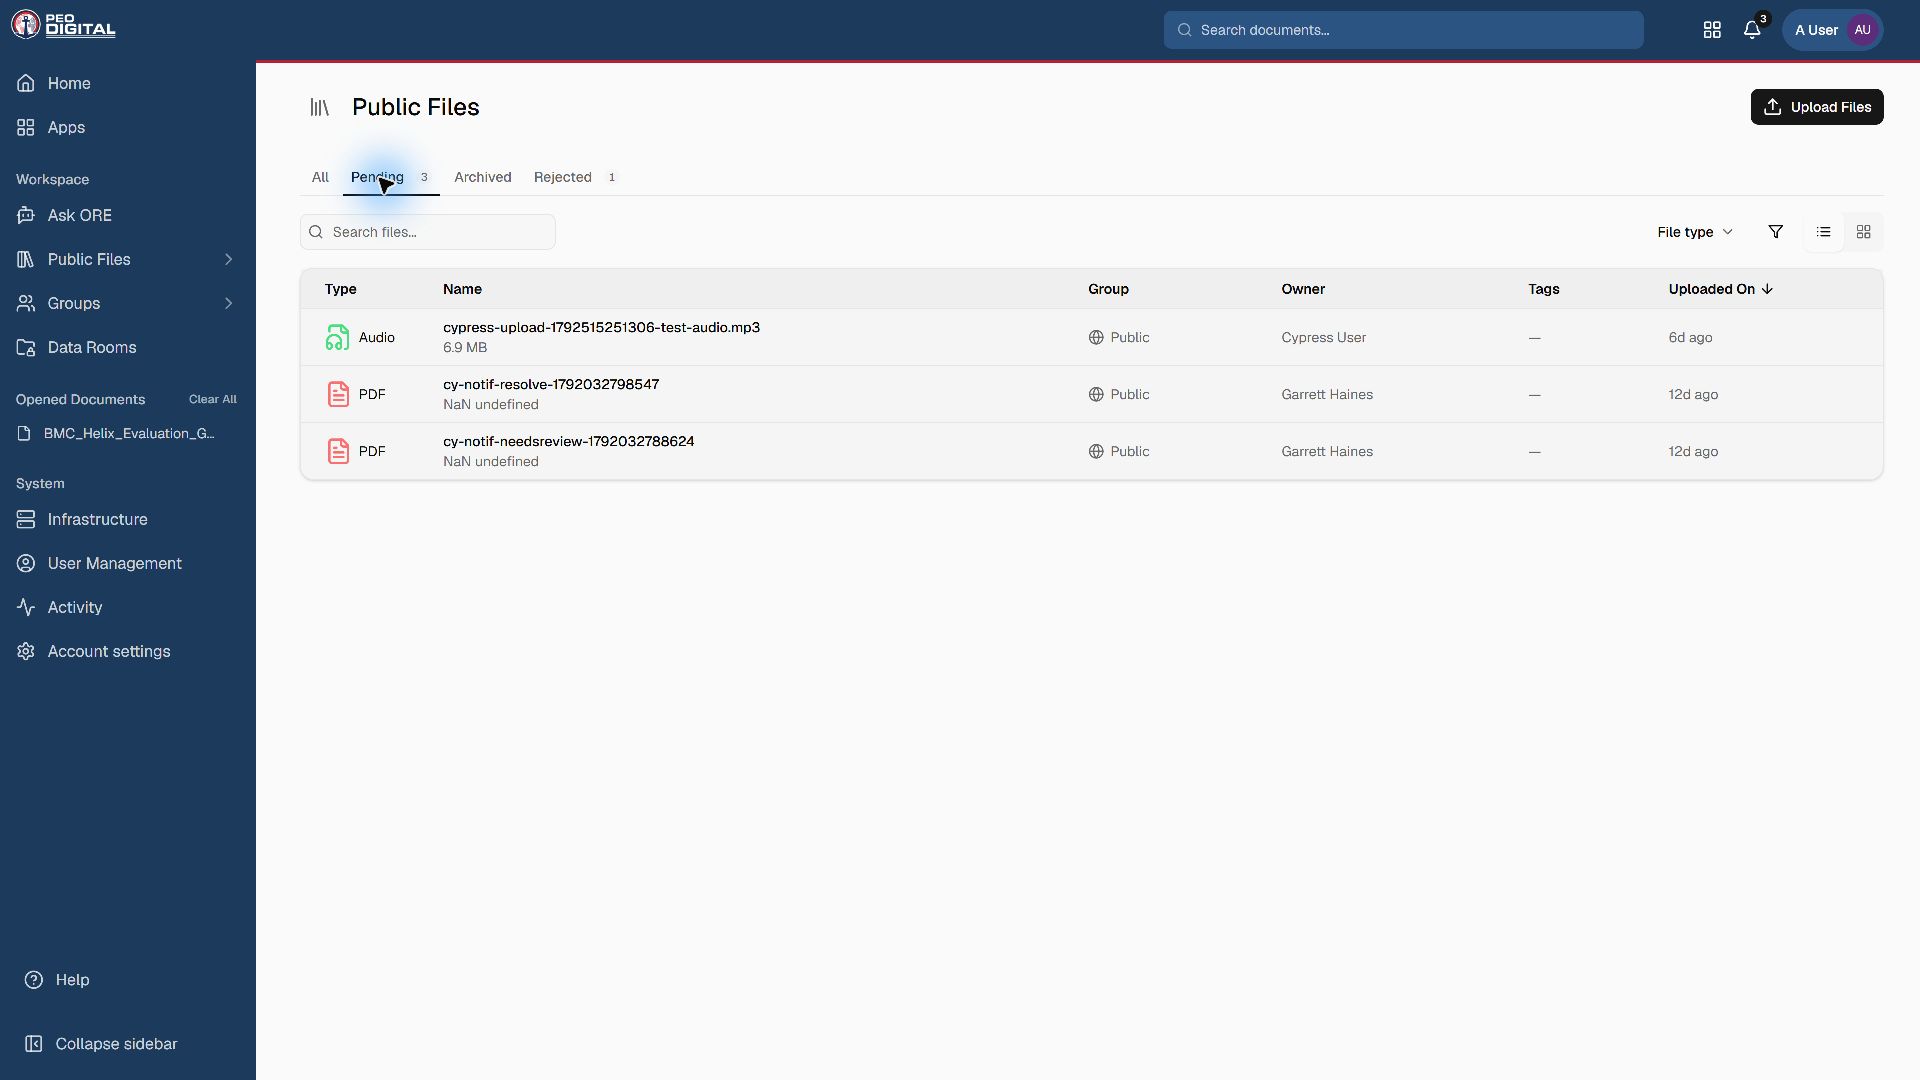
Where review is required, the file remains Pending until an authorized approver approves it. Public content requires a System Owner; group and room approval follows ownership of that destination. Open the destination's Pending view to track your submission.
Do not re-upload solely because a preview is still processing. Check the existing file and its status first.
Confirm the result
Open the file from the intended destination and check its display name, tags, and preview. Verify that any required approval has completed before directing other users to it. Ask an authorized teammate to check access through their own account; do not share credentials.
Find and view documents explains the viewer and its controls.
Recover from a failure
- Upload rejected: read the displayed reason. Do not rename a file to bypass a type, size, or malware rejection.
- Partial batch failure: check which files already succeeded before retrying. The dialog can remain open after a partial failure.
- Missing preview: wait for processing; if the error persists, send support the document URL and error text.
- Rejected review: ask the approver what to correct. Do not publish a second copy to avoid review.